
I’ve been creating content now for over three years and it’s been an amazing journey. One of the biggest lessons I’ve learned is to prioritise Audio over Video. Viewers will endure poor video and in fact considering just how subjective poor video is, it’s incredible how much they will endure – but if your audio is off just by a touch, they are out of there.
I’ve been using the Blue Yeti mic pretty much since I started and it’s been a great ride. I’ve tried many mics as possible replacements including the Elgato Wave:3 and the Marantz MPM-4000U but none of them provided anything more than I already have other than a few software bells and whistles that I didn’t really need. The issue however, is these are all condenser mics and were specifically designed for quiet environments like sound booths.
Dynamic Mics on the other hand are so well suited for broadcast environments with less than ideal sound stages (keyboards clicking, controllers thumping, birds singing, kids yelling) but the barrier has always been cost and complexity. Up until recently, if you wanted a good Dynamic mic for your setup you’d end up following the herd and grabbing a Shure SM7B and an interface like the GoXLR to plug it into which pushes your costs up considerably and often out of the range of casual content creators.
Deity have spotted this gap in the market and have introduced a USB Dynamic Mic – the Deity VO-70 and set it at a cost point that’s affordable.
I’m not going to get into the technicalities of the mic as there are far more qualified creators out there like Harris Heller and EposVox that have already created fab and fully featured comparisons, but this is for sure – this Mic is hot property.
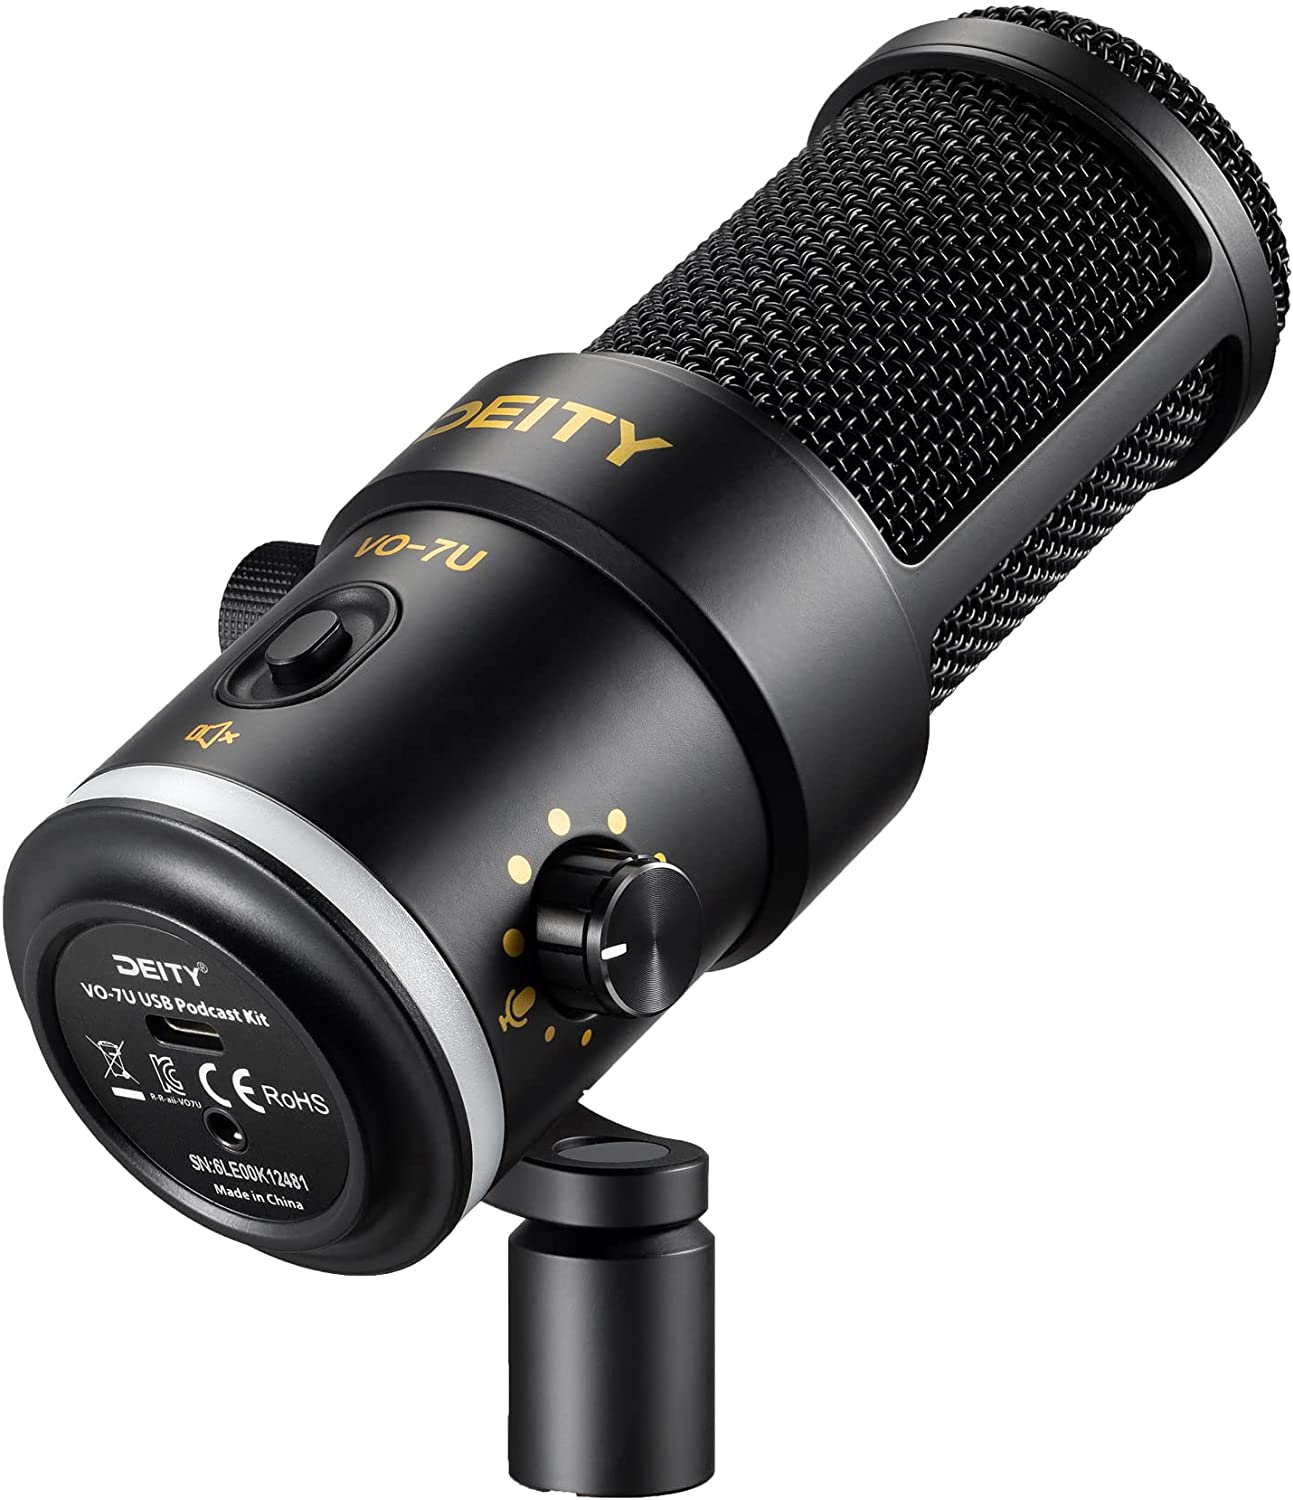
Deity VO-70 Controls
Something I wanted to cover however, was the controls on the mic as they are a little more involved than you may realise.
You have 3 physical controls:
– Mic Gain Knob
– Headphone Volume Knob
– Mute Switch
The two knobs (Gain and Heaphone volume) do exactly what you would expect when you turn them, but, they both are clickable and have a short press & long press function too!
Around the bottom of the Deity VO-7U is an LED RGB ring. By using a combination of Short and Long presses you can adjust the colour profile and the brightness and this isn’t immediately apparent.
The LED RGB light has 12 presets which you can adjust by pressing the Mic Gain Knob:
– Long Press – Turn LED RGB On/Off
– Short Press – Cycle through the 12 presets
The 12 LED GB Presets:
– 360 Slowly Spinnning
– RGB Slow White
– White
– Purple
– Red
– Candle Effect
– Yellow
– Neon Green
– Ocean Waves
– Cyberpunk Pink
– Breathing Light Effect
– Heart-Shaped Waterfall
I’m not usually a big fan of RGB (Do I even PC?!?!) but I have to say, these effects look fab and my personal fave is the White effect.
If you then Long Press the Headphone volume dial, you can adjust the brightness of the LED RGB
Finally, if you short press the Headphone volume dial, you toggle the 3.5mm output jack between USB Sound / USB Sound & Mic Monitoring which can be helpful depending if you’ve got open/closed back headphones on. I’ve paired this with the excellent Philips SHP9500/00 open backed set, so don’t need mic monitoring on as I can hear my own voice nice and clearly.
The Deity VO-70 is a game changer for me. The crisp output that barely needs any filters to get the most out of it is amazing, the power of the mic means I don’t need it stuck to my top lip and the feel, design and general style of the mic is outstanding. I think we’re going to be friends for a very long time.
What mic do you use for your content? How do you rate it? Could you see yourself swapping to the Deity VO-7u? Let me know in the comments. Thanks for reading and I hope this has been useful.
Loving the Deity VO-7U but I’ve run into an issue with Windows 11 – every time the PC is restarted the mic is not detected until it’s unplugged / plugged back in. Feels like a firmware update or driver update is needed. Not a game changer, but something to be aware of.
Furthermore, I’ve found that the mic level control in windows11 sound manager is not functional. As such, I must use the gain control knob on the microphone itself.
I experienced the same problem in Windows 10, regardless of which USB port I used to connect the mic, including going directly or plugging it in through a docking device. With VoiceMeeter it’s as simple as restarting the audio engine once the mic is plugged back in, fortunately.